Featured Post

Rain Puddles Design Privacy Policy (Click for entire post)

I'm working on a new privacy policy for my followers, but for now, you should know that if you comment on my site, my site collects da...

Showing posts with label MOPS. Show all posts

Thursday, May 26, 2011

A to Z Magnets


Good morning!

I'm sharing the last craft for our MOPS group this year. We spent the year learning all the different aspects of being a mom... from A to Z so to speak.


Our group had some wood letters from an inherited craft project this past year and we were brain frozen on what to do with them. My crafty assistant, Lori, came up with a great idea to turn them into magnets! We offered different kinds of flowers and leaves, but for the minimalist option we had ribbon to wrap once or twice around the letter and tie in a bow.


Have a great day everyone!

Details:
Paper: Green scraps, Real Red, DCWV La Creme Stock
Accessories: Wood letters, Tacky Glue, MFT Rolled Rose Die, Martha Stewart Frond punch, Stickles Black Diamond Glitter Glue

Thursday, December 9, 2010


A quick post with a quick project today!

Last month the project at our local MOPS group was this quick and great idea. We used Martha Stewart's Cook's Helpers template, laminated and cut out. A split key ring is slipped through a hole punched at the top of each helper and a bow tied to the ring. So quick and perfect for a gift by itself or as part of the gift tag.

Thanks to Lori M for coming up with this idea! {wink}

Monday, November 1, 2010

Holiday Planning Kit

For my MOPS group this past week, we decided to go organized-style. We made a quick kit that can be tucked away somewhere in the car or around the house that will keep us on our toes for the holidays.

Even if we have a master calendar and lists started it's always nice to have a place to contain our holiday planning and even to keep christmas cards, thank you cards and postage stamps.

I found some 8 x 8 inch clear plastic scrapbooking envelopes, 2 in a package, for $1. My favorite local paper store had chipboard in packages of 25 for under $4 as the stable base for our kit. The rest was all made or grabbed from other websites (appropriate permissions granted).

So here is the kit!

A large calendar for adding tasks and reminders like, "clean guest sheets ", "thaw turkey", "send xmas cards", "pick up table linens from dry cleaner" (yeah, I don't have to do that either. LOL)


What's that peeking out the back? LISTS! from the Organized Christmas website. She has two planner styles to download for personal use. A notebook planner and a pocket planner version. The lists here are from the pocket planner version. (Tip: All downloads are on the right sidebar.)


We added a notepad for any messages that need to be distributed or just a place to calculate what's needed.  The notebook paper was stacked 20 at a time and then cut to size. Then a perforator rotarty blade was run across the top, stapled together and covered with folded kraft text paper cut with a Spellbinders Label Six die-cut.


 Thanks for stopping in! Have a great Monday!

Wednesday, October 13, 2010

Small World 'round the pumpkin patch


Thursday is my oldest sister's birthday. I don't have a great and perfect card to send her and I knew I wouldn't get one done in time, so this week I'm flooding her FB page with well wishes and calling her up to find out what she'll be doing on her day. Now I'll post it so all my friends who know her can send her birthday wishes as well. *wink*

***HAPPY BIRTHDAY JUDI!***

It's a small world when you Google painting pumpkins with craft paint and the link you take is a contest to "Trick Your Pumpkin" by a craft paint company. The contest's Co-sponsor happens to be Craft Critique. One of Craft Critique's incredibly talented senior reporter's is my Design Team Coordinator for InStyle Stamps. Now don't you want to go blog hopping and see the links to this small world tour I just told you about? Okay, but first here is the reason I'm sending you on a link hopping fun spree.
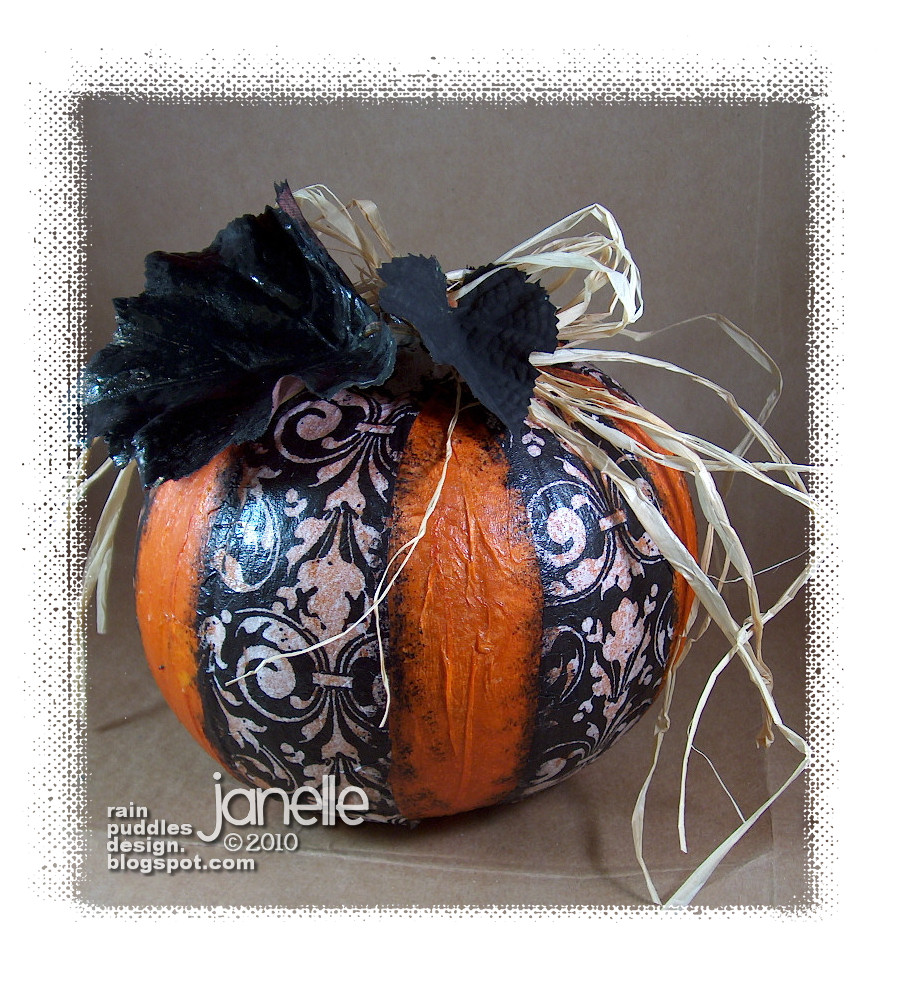
Today at my MOPS meeting we will be creating these decoupage pumpkins for our craft time. It goes together real quick and I know most of you have most of the supplies to do this for next to nothing.

Now here are the links to my small world tour.

~ Plaid's "Trick your Pumpkin" contest (look for the inspiration pumpkin on the main page, but if you want the instructions go to their decoupage section for the pumpkin here)
~ On the contest page is the Co-Sponsor link for Craft Critique
~ One of Craft Critique's Senior Staff Reporter is Taylor Usry
~ Taylor is the design team coordinator for InStyle Stamps
~ I design for InStyle Stamps!

Okay, now wasn't that fun and different and give you some extra mojo inspiration? Cool.

I hope you noticed a few things a long the way like,

Craft Critique is having a Halloween Blog Carnival, and
InStyle Stamps Color Inspiration challenge for the month is gorgeous rich colors (just like my pumpkin), and
I found some napkins for our MOPS pumpkins that look almost exactly like the inspiration pumpkin!

Have a great day!


Thursday, September 16, 2010

Name Badges for Moms


Hi all,

I'm a week late sending this Thursday post out. My best attempt at scheduling my posts and I've failed by a whole week! LOL I know you all will go easy on me. That's why I love my blogging friends so much.

For the new 2010-2011 Mother's of Preschoolers group this year, I have signed up to be the Creative Director. I'm not doing it alone and I have a ton of support, so I might have some fun with this new role.

I thought some of you might be interested in what we do for our creative time each meeting. Last Thursday was the first meeting and to break the ice we create our name tags around the art table to chat and help and get to know one another. With a few suggestions from veteran MOPS moms, I put together this idea. It needed to be easy, but give the moms some choice in creativity and here's what I did.

I gave the moms a pile of flowers, a pile of pleated and ruffled ribbons, various patterned paper and the use of all my edge punches to create their badges. Oh yeah, we added some bling too. {wink}

Here's a badge that was made up by one of the moms. I had to bring it home to fix the glued together pin and lucky for her I liked it so much I took a picture of it for my blog!


The flowers? I'm so lucky to have made friends with wonderful and talented ladies through this blog that I knew someone would be able to find just what I was looking for in a tutorial and supplies to make these flowers. Since the flowers took quite a bit of time for me to put together, my creative assistant, or the one who keeps me organized, suggested we have them all made up instead of the moms making them. (You can see the link at the bottom of this post for a tutorial.)

The flowers are glued to jewelry bar pins so moms could reuse them at the end of the MOPS season to pin them on a hat or shirt or summer bag...really whatever you can get a pin through you could use these flowers. I really like how they came out.

You'll have to image what all the different badges might look like with these flowers. So much fun!


Materials: Poly Liner fabric cut into 1 1/2- inch strips, jewelry bar pins, candle flame, needle and thread, felt backing, hot glue gun. Tutorial

Thanks for stopping by!