Featured Post

Rain Puddles Design Privacy Policy (Click for entire post)

I'm working on a new privacy policy for my followers, but for now, you should know that if you comment on my site, my site collects da...

Showing posts with label DigiStamp Boutique. Show all posts

Friday, June 29, 2012

Fairy Princess Invitations are full of fun and glitter


I have a friend, whom I absolutely adore, that is so hard to figure out a type of gift for give. So whenever there is even the slightest need that I might be able to help out... I jump on it! LOL

My friend's daughter is going to have a Fairy Princess Birthday Party in July. It's going to be a tea party and a fancy one at that. When she asked if I had any stamps that would fit a birthday of this type... I snickered and worked my angles to find out what she needed. I quickly looked for some stamps and found THE adorable Miss Fairy Grace in my digital stamps file. She was perfect for the card. I grabbed my Copic markers and started coloring 5 printed images, each one specifically colored to look like the invited princesses. I needed a tea cup and sentiment on the cover. I dusted off my graphics software and went to work. Is that not the cutest cup!!!!! I really am tickled with how it turned out. Just tickled.


The card base is embossed and left simple so I could focus on the magic and glitter any Fairy Princess should possess (on a card.) The digital image is cut out with a circle die and matted with a Scalloped Lacey die. I fussy cut out the sentiment banner and popped it up with foam adhesive dots. I added two types of glitter to the card front. The wand, wings, hair flower and dress trim are lined and dotted with the Sakura Clear Star Gelly Roll pen. My new toy is a Quickie Glue pen. Yes, I think I'm in love with that pen! It freely and precisely rolled glue where I scribbled so I could dust on some Martha Stewart Charoite glitter around the die cuts and below sentiment banner.


And for those curious of the Copic palette from all of these cards... (click to enlarge)


Details:
Stamps: Fairy Grace (DigiStamp Boutique)
Paper: White (Mohawk), Perfectly Plum (Stampin' Up), Purple 
Ink:  LaserJet, Copic Markers
Accessories: Circle and Scalloped Lacey Dies (Spellbinders), D'Vine embossing folder (Cuttlebug), glitter (Martha Stewart), Quickie Glue Pen (Sakura), Gelly Roll pen (Sakura)
Pin It

Wednesday, April 4, 2012

Simply Happy Rabbits


If ever I have a card done before the day I need it, it's usually not going to work after all. Today is different. I've had these two bunnies, Digby and Daisy, from DigiStamp Boutique printed out for over a month and slowly colored them exactly how I wanted. I'll be tucking these cards into my children's easter baskets along with special treats.


I'm tickled how much fun they look and that they are done... days ahead of time. Not hours!

Have a delightful Wednesday!


Details:
Stamps: Digby and Daisy (DigiStamp Boutique)
Paper: Kraft (Mohawk), Smooth White (Neenah)
Ink: Laserjet,  Alcohol Markers (Copics), 0.08 Black Multiliner (Copics)
Accessories: zig zag scissors (Fiskars)

Pin It

Tuesday, January 3, 2012

Without You...


Today our schedules started back to normal. The hubby of mine is back to work and it's the kids and I for one more day until school resumes.


This card just says it all for us today, in two ways. There wasn't snow this holiday to play, although the kids did make a tiny mound out of fallen hail that resembled a snowman once a carrot was placed near the top, and when my hubby is gone it just doesn't seem as special of a day.


This snowman had a pal when I printed him out. It was good ol' St. Nick. Then time flew by before I could color up this sheet of digis and so did the holiday, so I cut out the snowman and left St. Nick behind for another year! Maybe I need to sign up for the SCS Christmas Card Challenge this year just to get them all done. hmmmmm..... The sentiment on the outside and inside are computer generated and designed by none other... if you're interested in getting them just comment with your email. I'll only give it out until Friday, January 6th 5pm MT, so get your request in soon.

I colored with copics and here the colors.


I've got a lot coming up this week! Hope you'll stop by often!


Details:
Stamps: DigiStamp Boutique Cute Santa November Freebie (sorry, it's not available any longer)
Paper: HL kraft cardstock, Neenah Smooth White
Ink: printer, copics
Accessories: scissors

Tuesday, October 11, 2011

New Arrival: Look Out World


Whoa! It's amazing how busy I've been since school has started up in my family. I noticed last week that I haven't come by with a project for over two weeks and I do miss having something to share.

Yesterday I etched out some time to put an image from DigiStamp Boutique that I had colored so long ago into a card. Now I have something to share with you all.


This is Rex and Roxy with their new little family member are "Out of this World" cute. I used my copic markers and practiced some texture techniques on the belly of the baby and also the underside of the dad. One item to note is that I made a deliberate attempt in leaving white cardstock on some of the colored areas for a shine and light effect. I have some ways to go before I come close to doing what I'm thinking, but just seeing these dino's colored makes me smile.

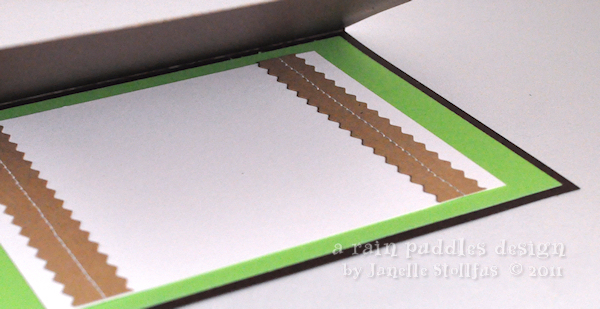
Since the card front is CAS I decided to use some color and layers inside the card. Here's a peek at that.


I know I missed saying Happy Monday, but I can still pay it forward for a delightful Tuesday! Thanks for stopping by today!

Details:
Stamps: Rex and Roxy (DigiStamp Boutique), "Look out World" sentiment from To the Moon (Verve)
Paper: Chocolate (Wausau Royal Fiber), Smooth White (Wausau Exact), kraft and green (scraps)
Ink: Laserjet, Tuxedo Black (Memento), illustrator markers (copic sketch)
Accessories: Pinking rotary blade cutter (Fiskars), sewing machine (beloved Janome)

Thursday, September 22, 2011

The Gift of thought


I was asking my daughter what she wanted in her backpack for lunch one morning and she happily said, "the usual." Her body stood still and you could tell she was thinking on something then she said, "And I'd like a note in it too."

I was reusing the tags I made because I just couldn't stop putting something in her lunch box so she knew I was thinking about her during the day. But one day, I was in a hurry. She hadn't been saying one way or another about them reappearing in her lunch box so I left it out.

It's amazing how our little gestures, even gone seemingly unnoticed, are important. I'm glad that my daughter likes the little extras in her lunchbox and I hope I can keep them up without fail. I pulled together a new one for her Monday lunch this week and here it is.


A digital image from DigiStamp Boutique called Birthday Beau.
It was already printed out so I just needed to color it and find a good sentiment to add with it. And now a plug for recent Verve release set that has almost every sentiment you might need, it's the Small Phrases set.


Thanks for stopping by!

Details:
Stamps: Birthday Beau (DigiStamp Boutique), Small Phrases (Verve)
Paper: kraft (Hobby Lobby), Pumpkin Spice (SU), scraps of red, white (Wausau)
Ink: laserjet printer, tuxedo black (Memento), copic markers
Accessories: jewelry wire, shaper scissors (Fiskars), rectangle hole punch (Fiskars)

Thursday, September 15, 2011

Coco Love


I managed to leave out a tag for my lunchbox tags series last week. Like you haven't gotten enough tags, LOL.

This tag has my most favorite of all my teddy bear stamps, I think ever! I've got a few of them. It's Coco from DigiStamp Boutique. He just melts my heart every time I see him and I love how he came to life with the coloring I chose to use.


Last week I mentioned that DigiStamp was coming out with new September specials, there was a snafu but they are now available. If you like cute nativity scene's you'll want to go check them out. Can I say "Adorable angel!" Back to Coco... awwwwwww....


I hope you are all having a fantastic Wednesday, uh, Thursday! Thanks for stopping by today!

Details:
Stamps: DigiStamp Boutique Coco with little hearts, Verve Happy Phrases
Paper: scraps from the green and pink bin (Hobby Lobby and SU!), white cardstock (Neenah)
Ink: laserjet printer, Multiliner 0.05 black pen, copic markers
Accessories: nestibilites, button stash, Lydia's cotton thread Size 10, Michael's ribbon, Fiskars Razorback scissors

Tuesday, September 6, 2011

More Lunchbox Tags

I’ve decided I love coloring! Yes, again. It’s been a long, long time since I’ve had a desire to get the markers and digi images out every night, but it’s started up again while making "notes" for my daughter's lunchbox meals. Two of the tags have already been sent in her lunchbox, but the last one she'll find today.

I’ve colored up some DigiStamp Boutique images that were already printed and ready to color. I love these images and can’t believe how long it’s taken me to get back to them. Sally-Ann has a release today so it’s a perfect time for me to plug in a linky to go see what’s new!!!!!!

There’s Jasper doing the happy dance.


card174w

and Barney and heart

card176w

then my favorite monkey Valentine Marvin.

card177w

I can’t wait to see what’s new for September!

I’ll be back tomorrow with some more tags using Paper Smooches!

Where's the details? Just send me an email (found on my About Me section) if you have any questions or in the comments for this post. The names of the images are links to the DigiStamp Boutique store.

Monday, August 22, 2011

The sweetest cupcake…


Good morning! Over the weekend I made up this little card using an image from DigiStamp Boutique. I've been missing my digi-images and decided to print them out, give them a little love and get my feet wet with some new markers.

card171w

My card has a cupcake from an A4 collection called Mother’s Day Sheet. It’s no longer at the boutique, but there is another adorable cupcake in the Everyday Collection 1 set.

card171wdetails

There are plenty of sketch challenges out there and I am always going to find one to finish my cards up, but this time I knew what I wanted to do with this sweet cupcake. If you want to have a fun and easy sketch to try out here you go. Leave me a comment if you decide to join me! I’d love to know how you used the sketch so leave a link for me to hop on over and see!

casSKETCHE082011

Hope you have a wonderful Monday and thanks for stopping by!

Details: (A2 size card)
Stamps: Mother’s Day Sheet A4 Collection
Paper: kraft (Hobby Lobby), chocolate (Wausau), smooth white (Neenah)
Ink: laserjet, copic markers
Accessories: Doodolonomy Fred (free font), pop dots

Monday, January 31, 2011

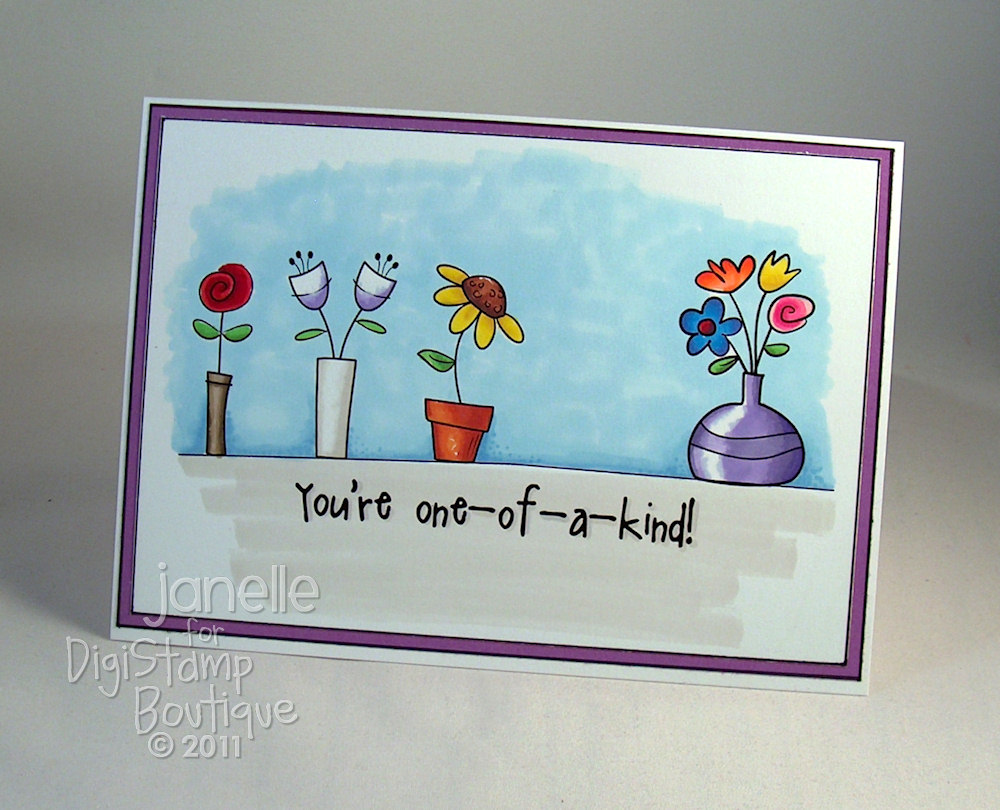
You're one of a kind!


My card today uses all four of the flowers from the Flower Doodles set at DigiStamp Boutique. I love the whimsy feel to them and had to put all of them on the card. Yep. There are four separate images! I just made a curved line across the bottom of the vases to tie them all together.

This card is a reminder that there's no other day like today, there is no other person uniquely made like you, and there is no other moment than the present to pursue being what you want to be. Any other day of our lives can be just as beautiful and in just as fun of a container, but it's the only one that is for us in today. Let's enjoy it in every way we can!

Today I'm finishing my time as a guest designer with DigiStamp Boutique. I'm thrilled that I was able to design for such a sweet and talented artist and owner at DigiStamp Boutique. Thank you Sally-Ann!


Here's my end of the month reminder to stop on over at the boutique if you haven't lately. She's got some wonderful images for the holiday coming up and I'm certain when the calendar month flips over to February we'll see some more fabulous images to grab up. Here's a linkie for images of love and valentine because I'm an enabler. {wink}

Blessings to your day!

Details:
Paper: Neenah Smooth Solar White, Violet CS
Ink: LaserJet, Prismacolor Markers, PITT Artist pen (outlines around image and violet CS)
Accessories: what? no accessories? ;)

Sunday, January 30, 2011

A Coco Heart


I've got an all time favorite digital stamp image to share today. Coco with Big Heart from DigiStamp Boutique cannot get any more cute! When I first saw this bear a year ago it reminded me of my own stuffed bear named Mocha (for it's fur color) and every time I color Coco those are the Prismacolors I pull off my shelf. I'm hooked.


The card was very easy to pull together... once I had the time. I used some oval nestabilities to cut out my prismacolor marker colored Coco. Then a scalloped oval nestie to frame it up nicely. It's been forever and one day since I've used my Stickles and what better time than when hearts are the theme, so I dotted the scallop mat with Xmas Red. I matted some Love paper from Me and My Big Ideas with kraft text weight paper, then began to pair up some ribbon to criss cross around the bottom of the card. I ended up with some gingham ribbon I bought at JoAnn's $1 display at Christmas and red satin from my 19 penny bag from Hancock Fabrics.

The card base still looked a bit bare so I grabbed a new stamp set from CTMH called Simple Stitches and carefully stamped a narrow zigzag stitch around the Love paper border. I say carefully, because I had already adhered the ribbon AND the mats to the card base.


The sentiment is a fabby ticket Sally-Ann designed and I love that she's got them already colored for a simple addition to any sweet card. You can find the tickets in the Valentine Sentiments collection.


I hope you are all having a sweet and cuddly weekend and hopefully rested for you week ahead.


Details:
Stamps: Coco with Big Heart, Valentine Sentiments, CTMH Simple Stitches
Paper: M&ME Love DP, kraft text, Wausau Cream CS, Neenah Smooth Solar White
Ink: LaserJet, Prismacolor Markers, CTMH Brown Bag
Accessories: Nestabilities Oval and Scallop Oval, perforating blade (ticket), Misc. ribbon, Xmas Red Stickles

Monday, January 24, 2011

Lovely Together


I'm dropping in with a jazzy card today. I've used Pippa and Sonny with Rose from this month's offer at DigiStamp Boutique. The offer has three adorable images with Pippa and Sonny.


Pippa and Sonny are colored with Prismacolor markers without a color challenge or designer paper as the inspiration. When it came time to put the image on the card I had to dig pretty deep to find something to go with it and I found that in the Butterflies and Blossoms Stack pack. After finding the psychedelic paper, I cut out some hearts from my Cuttlekids collection of dies and colored them the same as the rose Pippa and Sonny are holding. Then I outlined them with black pen and added some dimensionals to make them pop. The sentiment is from Verve's Heart's Desire is stamped in Graphite Black.

When I got to the background I decided it's a new year and it time for a new background technique. I chose two shades of color from my Prismacolor set and started making circles. I've never done this before so I was pleased with how it came out.

Here's a little side view to show off some simple layers.

Here's some new collections Sally-Ann has added to the Boutique. They are darling!


Zoe Princess Collection

Valentine Birds

Thanks for stopping by today!

Details:
Paper: Butterflies and Blossom's stack pack, Neenah White, Basic Black
Ink: Laserjet, Prismacolor Markers, PITT artist black pen, Brilliance Graphite Black
Accessories: Cuttlekids heart dies, Nestabilities Classic Square die

Saturday, January 15, 2011

Happy New Year, With Love and a Moxie Fab Challenge


It's halfway through the first month of 2011 and I'm just now making a post? I'm thinking its going to be a year of busy schedules with school events and activities for us!

Today I'm coming in to the year with love. Love for an image named Sonny with roses. He's ready to give out some flower powered love on the card I made and in such a sweet green argyled day along with a dreamy hillside below a blue cotton candy cloud.


Gray is the New Black Challenge is still on over at Moxie Fab World until January 24th. I was thinking of a unique way to use gray when I wanted to create a comic-book-like outline for the top note shape and cloud on this card.  It just seemed a unique opportunity to use gray where I would have grabbed from some black cardstock.
Hope your day is just the best!

Details:
Paper: blue, white and gray paper scraps, plaid DP from DCWV Flower Shower Spring Pack
Ink: Laser and ink jet, Prismacolor Markers and pencils, SU! pastels
Accessories: SU! Tasteful Trim Die Cut and Top Note, DMC embroidery floss,

Friday, December 31, 2010

DigiStamp Boutique Emile Invites You!


The last day of 2010 is here! It's been so much fun to get creative and be inspired by all the crafters in this online community. I know I've spent many hours jumping over to follower's blogs for some fun ideas, to galleries for inspirations and community blogs for challenges. I hope to keep doing that in 2011.

DigiStamp Boutique's EMILE invites you to 2011! Come and join in the fun of a new year, no RSVP required.


(P.S. He can also be a great baby or toddler invitation card too!)

I hope everyone of you will have a safe New Year's Eve and a joy for the New Year!
God bless...


Details:
Stamps: DSB Emile and Balloon, Stampin Up Mark the Date and Please Come
Paper: Scraps of paper, photocopy paper
Ink: LaserJet, Prismacolor Markers, Basic Black
Accessories: Spellbinder's Circle Dies, Stampin Up Spiral Punch, Tasteful Trim Bigz Die, Dimensionals, Paper crimper, Tim Holtz Mini Stapler

Wednesday, December 15, 2010

Birthday Warm and Cozy


I'm stopping in for a quick post with another Beau image from DigiStamp Boutique's Offer of the Month. She's Birthday Beau.


I used my prismacolor markers on Beau and sponged Vintage Photo ink around the edges after rounding the corners. Matting is a dark red from my local paper store rounded a couple of corners on that one too. I had made some background paper a while ago and had it in a stash pile that I rounded the corners and placed on some Crumble Cake cardstock. I believe the technique I used is embossing folder first, then ink up a brayer to run across the raised texture and lastly use a mister filled with water to spread the ink a smidge (tiny amount). I stamped a sentiment from Stampin Up's Fresh Cuts and cut it out with Spellbinders Large Labels to tuck underneath the mat.

This is the first time I've done a ribbon technique like this and I didn't want to make a mess of my layout trying it out. My quick fix was to put some red line tape on a piece of scrap kraft paper and then if it turned out I'd adhere it to the card. That worked out so I wouldn't ruin the card and waste any ribbon!

After everything was on the card I grabbed my new favorite pen, Spica Clear glitter pen, and quickly traced a center line over all the embossing of the background paper. It doesn't show up in my photos ~at all~ but it looks really nice.


Thanks for checking out my creative puddle today!
Details:
Stamps: DSB Birthday Beau, SU! Fresh Cuts
Paper: Neenah Solar White, Kraft, Dark Red
Ink: LaserJet, Prismacolor Markers, Vintage Photo ink, Spica Clear Glitter pen
Accessories: Offray ribbon, Tim Holtz Texture Fades EF, Spellbinders Large Labels, Crop-a-Corner, sponge

Friday, December 10, 2010

What a Beau-tiful Wish!


Happy Friday everyone!

How are all of your Holiday projects coming along? Mine are slowly getting done and I'm not panicking yet (that's good news). It will all become clear that I didn't give myself enough time to get any of them done though, but that's okay. My family really understands how I work...they'll get it when I'm done with it. LOL

That's about the same with my card making. I've had this image colored and waiting to get put on a card since last weekend. I just had to take my time to figure out how to put it on a card. It needed a great framing style layout.


Winter Beau is the digital stamp on the main panel and she is my favorite from the December Offer of the Month. She's just amazing! I colored with Prismacolor markers and pencils, but I pulled out my chalks for a soft brown background around the image.

I layered some ribbon behind the main panel and then a panel of kraft stamped with Hero Arts Cling Stamp called Friend in Creamy Caramel. It's not even noticeable in real life, but the left and right side of the background panel was cut with a perforated blade.


The sentiment ensemble is stamped and embossed with a Verve saying out of the Kind Words set on a red cardstock scrap. I made a ribbon banner with a strip of leftover embossed white cardstock using the Stampin Up Petals a Plenty Textured Die and some more green grosgrain ribbon. I was in the mood to tinker around with a button and some beads and wire to finish off the ensemble.

The key ingredient in starting the layout happens to be the red ribbon tucked under the green grosgrain and the main image. That red ribbon is part of a fabulous grab bag I got at my local fabric store. I think there are over 10 yards of ribbon in all sorts of gorgeous styles and colors. The price of one bag? $0.20 I could not believe how gorgeous some of this ribbon was so I bought three bags. You just can't pass up that great of a deal, right?


Thanks for going down my thrifty lane for a bit there, but now on with my card for today.

I hope you enjoy your weekend and hopeful you all will find some time to relax.

Challenges I played in with this project are:
Splitcoast Stampers Ways to Use It - WT299 Letters
Secret Crafters Saturday Challenge - Christmas
Paper Issues - Holiday Hook-Up

Details:
Stamps: DSB Winter Beau, Verve Kind Words, Hero Arts Friend Definition
Paper: Old Walmart Scrapbook kit, kraft, Neenah Solar White, Real Red
Ink: LaserJet, Prismacolor Markers and Pencils, Stampin Up Pastels, VersaMark, Ranger Walnut Ink Stain
Accessories: Craft wire, glass beads, green button, White embossing powder, green grosgrain ribbon, red satin ribbon, paper crimper, Stampin Up Petals a Plenty Textured Die, dimensionals, ISP red tape, Glue Arts Raise'n and Ribbon adhesives 

Saturday, December 4, 2010

Quick Christmas Cards


I hope you all are having a satisfying start to the weekend. I've been working on some knitting projects and enjoying the decorated Christmas tree in front of me. I love to bring out my assortment of teddy bear ornaments, especially the jointed ones that my dear friend Stephanie somehow manages to find year after year. SO CUTE! So I love to have anything festive about my house and with that in mind I have two cards to show you today that came together quickly and the images steal the show. Cute Nativity Kids and the tree image from Christmas Doodles are on these cards. They were part of the November Offer of the Month and I just can't get enough of them!


Nativity Kids Details:
Stamps: DSB Cute Nativity Kids, Verve Richly Blessed (temporary link to the Reveal at SCS)
Paper: Cream Cardstock, Brocade Blue, Kraft, Neenah Solar Smooth White
Ink: LaserJet, Prismacolor Markers, Spica Clear pen
Accessories: Holtz embossing folder, hemp twine, muslin


Christmas Doodles Tree Details:
Stamps: DSB Christmas Doodles, Verve Glad Tidings (temporary link to the Reveal at SCS)
Paper: Kraft, Neenah Solar Smooth White, Scrap of Carmine Red CS
Ink: LaserJet, Prismacolor Markers
Accessories: Holtz embossing folder

 
December Offer of the Month is a new image character that has so much potential. Jump on over to DigiStamp Boutique and have a looksey!

Saturday, November 13, 2010

Wishing you Love


It's a valentine card today. It's true, just around the corner it will be the big month of everything sweet and red and romantic. It always sneaks up on me and most particularly when my kids have valentine day at their schools. So yes, I have a valentine card collection starting with this one. LOL


This card has a digital stamp from DigiStamp Boutique called Valentine Zoe... too cute, don't you think so? Joining Valentine Zoe in the Valentine Cutey Characters set are Henry, Marvin and Matilda, which is one of the two Offer of the Month treats at DigiStamp Boutique. Here's the linky if your itching to get them on the spot.

I had some fun creating several home made embellishments for this card. I was in the mood to craft and stay in denial about Mount Laundry, Menu Planning and house cleaning for the holidays that were planned. I was in my craft room all day! Well my two sweet children were crafting beside me. They started at 6:30 this morning in fact. LOL

First, I collaged some pattern paper with two Stampin' Up retired background stamps (a distressed scratched BG stamp and Checkerboard BG). Once I pulled the image, ribbon and paper together I used the rolled flower technique with some red cardstock for miniature flowers, but instead of a spiral line I did a scalloped spiral line. I didn't come up with this idea and it might be out there somewhere as a tutorial, but I did see it as a die from a Member Company at Splitcoaststampers. I was curious how that idea would work so I drew a 1 1/2 inch scalloped spiral on the cardstock and cut it out. Pinched the beginning with some pointy tweezers and started to roll it tightly around the tweezers to weaken the paper fibers. Then I let go a bit so it would loosen the spiral and open up the flower. I used Quick Drying Tacky glue and held it in place until it stayed. I curled the petals with the tweezers then squirted some red Stickles glue in the middle.

I also made up some tickets. Here's the quick steps to make your own ticket strips. Cut a thin strip of paper 1/2 inch taller than the stamp you want to use on the ticket. Use a rotary perforating blade in your hand rotary cutter or if you have a slider trimmer that can use the perforating blade. Make perforations 1/2 inch longer than the stamp image. At each intersecting perforation and edge of the paper punch a half circle with a standard hole punch. Voila!


Details:
Size: 5 1/2-inch square
Stamps: Valentine Zoe, For a Friend, Checkerboard BG, Weathered BG (?)
Paper: Neenah Solar White, Real Red, Petal Press Textured Brown Paper, Kraft (cardstock and text copy for ticket)
Ink: LaserJet, Prismacolor Markers (image) and Pencils (ticket), Basic Black, Creamy Caramel, VersaMagic Red
Accessories: 1 3/8 - inch circle punch, perforating rotary blade, blue grosgrain ribbon, Quick Dry Tacky glue, Red Stickles, MFT big scalloped die

Thursday, November 11, 2010

Hoot for Joy!


Whoo-Hoot! or is it... Hu-it, tohoo! Hoot is coming to spread a bit of joy on my card today.


The owl, Hoot, is colored with Prismacolor Markers and handcut with a craft knife. I had quite a few die cuts lying around on my table so I decided to just pull them together for this card. What was lying around? A tag die from Verve, a photo corner from Martha Stewart, jumbo ricrac from My Favorite Things and a circle from Spellbinders. I used Papertrey Ink's rick rack for accent. In Basic Black ink, I stamped 2003 Stampin Up mini background onto the card base and the 2007 "joy" stamp on Neenah Solar White. The kraft circle needed a little something so I grabbed a sponge and white gesso paint and did some accent sponging around the edge. For some finishing touches I gave the tag some tails with hemp twine and three black rhinestones from American Crafts.


Pile It On Challenge - Christmas or Winter with Animals
Lil Red Wagon - Use some red
Raise The Bar #43 - Curves
Stamping Vacation - Pick 3 for November (Green card base, popdot and tag)
Lexi's Creations - Anything Goes

Thanks for stopping by!

Details:
Card Size: 4 1/4 x 5 1/2 inches
Stamps: DSB Hoot, SU Fresh Fillers and Perfect Presentation
Paper: Using up Scraps
Ink: LaserJet, Prismacolor Markers, Basic Black, Gesso Paint
Accessories: Verve Sweet Scallop Die, Spellbinders Standard Large Circle, My Favorite Things Jumbo RicRac, Papertrey Ink Rickrack, Martha Stewart Photo Corner, Hemp Twine, American Crafts Black Rhinestones