Featured Post

Rain Puddles Design Privacy Policy (Click for entire post)

I'm working on a new privacy policy for my followers, but for now, you should know that if you comment on my site, my site collects da...

Showing posts with label Resin Crafts Blog. Show all posts

Friday, May 31, 2013

Jewelry + Metal = Stampendous Blog Hop


Okay, have you all loved the metal and jewelry resin mixed with Stampendous? We have covered four days of creative projects with all these fantastic products and it's worth an applauding mention to them individually.


EnviroTex Jewelry Resin from ETI and their brand new Jewelry Clay
These products are easy to work. The hardest part is keeping your attention on the instruction because you can't wait to get started. READ the instructions and the rest is easy.


Carmi at Resin Crafts Blog 
Thanks for all the inspiration and information to always keep us going with our jewelry resin and clay.

I'm a klutz at pulling jewelry components together. I'm sure there is even a better name for "jewelry components", but when one starts with quality foundation well that's the most important. We were so fortunate to work with products from
A special thanks goes out to them.

Blog hop details (and prizes):  Comment, comment, comment. That is, if you want a chance to win these terrific products. Our prize package includes BOTH the clay and resin, plus a nice assortment of bezels from Nunn Designs, and, of course, some stamps and Essentials from Stampendous! 

You have until Sunday night to comment on the blogs below to be in the running for our prize packages!

Here's who made some new inspiration for you today:

Asia King

Cyndi Bundy

Janelle Stollfus - that's me!

Krissy Fossmeyer

Kristine Reynolds

Lea Kimmel

Rhea Weigand

Suzanne Czosek

Tenia Nelson

Tobi Crawford

For more chances to win fun stuff, join us next week for another Blog Hop! (I don't know how we got three in a row either, but hey...more prizes!!) This time we're playing with Core'dinations, and May Arts Ribbon. You know paper and ribbon get us going every time, so don't miss a minute! (you really should just subscribe if you don't already... it's at the very top of the post) PLUS - remember this is the final week of May's Fabulous Floral's Challenge! Be sure to add your project to the linky tool in the right sidebar or on the May Challenge Page.

Are you ready for my project? Wait no more!


For the base of the pendant and ring, I stamped a portion of the Royal Insignia background stamp onto white paper with Memento Tuxedo Black ink then antiqued it with a spray bottle of coffee water. A quick dry with the heat gun and then glued it into the bezel base with Mod Podge with a thin top layer to seal it. On the pendant I grabbed some twine and wrapped it a few times the size of the rim and then glued it down. Made a bow and glued it down as well. The glitter, crushed glass glitter and Shaved Ice were sprinkled around the edges and then the flower shape rhinestones were strategically placed. I repeated this process sans twine for the ring bezel and then began to pour resin!

That's it from me. Now it's time to go to Krissy Fossmeyer for some more jewelry goodness.

Details:
Envirotex: Jewelry Resin (Where to Buy)
Nunn Designs: Adjustable Large Circle Ring, Circle Pendant (Where to Buy)
Stamps: Royal Insignia Background (Stampendous)
Paper: White (Neenah)
Ink: Tuxedo Black (Memento, Tsukineko)
Accessories: Black Crushed Glass Glitter (Stampendous), Shaved Ice (Stampendous), Silver Halo Glitter Mix (Stampendous), Spray Bottle (Stampendous), hemp twine (May Arts), flower shape rhinestone (NA)

Pin It

Tuesday, May 28, 2013

Jewelry - Stampendous does a great mix-in!


Last summer Stampendous and the Design Team partnered with Carmi of Resin Crafts Blog for a week long explosion of fabulous jewelry and that was so much fun we are doing it again this week. We have something new to share with you for our project this week.

We welcome back Carmi of Resin Crafts and the amazing products from Envirotex including their new jewelry clay!
AND
The wonderful jewelry components from


This necklace is made with the Antique Copper Framed Rectangle Single Loop Pendant from Nunn Designs and some mixed Jewelry Clay from Envirotex. Just like with the Jewelry Resin, read the instruction thoroughly before you start. You'll need some disposable gloves to work the two-part clay, something I apparently don't have readily available.


I used Stampendous Tiny Alphabet to create the word JOY. I noticed after working in the beads, earring pins, Stampendous Bronze Fragments and Ultrafine Glitter that the word started to disappear so I stamped it  again with black ink and made a pretty deep impression long after I had formed the clay. This means there is quite a bit of time to play with it and that's good.

So we have a hop of inspiration for you every day this week. Check in with Carmi at Resin Crafts Blog every day... even if you don't see a post from me! She will have something that will knock your socks off, trust me. There will be prizes from Laura at Stampendous for commenting each day, just stop in at the Stampendous blog for a new list of designer blogs. Here's today list.

Janelle Stollfus - that's me!

Remember to check in at Resin Crafts each day and also Stampendous Impressions blog to get new inspiration.


Details:
Stamps: Tiny Alphabet (Stampendous)
Paper: NA
Ink: Jet Black (StazOn, Tsukinkeo)
Accessories:  Bronze Glass Glitter (Stampendous), Lavendar Micro Glitter (Stampendous), pearl pigment powder (PearlEx), Rectangle pendant (Nunn Designs), earring pins ($1), antique glass beads (Mill Hill), leather cord (May Arts), copper and gold wire scraps

Pin It

Saturday, July 14, 2012

Making Resin Jewelry with Stampendous and Resin Crafts

Oh yes, we are making jewelry with Resin Crafts and Stampendous... All of us!


It's mega Resin Hop Day! Seriously, have you enjoyed all the projects or what. I think the Stampendous team did a fabulous job with only a few people that have ever created before with resin! That has something to say for the products we used, right? Thanks so much Carmi of Resin Crafts and Stampendous! for treating us so well with supplies!

Important Info Right Here!

Visit each blog and be entered in our drawing for a great prize package when you leave a comment! If you don't tell us you were there by commenting, we can't include you in the drawing! We'll pick a winner from today's comments separate from the commenters throughout the week*. Get hoppin!

Resin Crafts Blog (Canadian Prize Details!!!)
• Janelle Stollfus •
Next... Jennifer Ingle


Now for the whole view of my project today! Yay!

I found a frame magnet at Craft Warehouse on sale that I used for my "bezel". Since the frame was open in the center I cut out a circle just wide enough to reach the back of the frame, but not cover the magnets. I used my PITT artist Pen to trace a border on the circle, but made an oopsie mark, so I just repositioned the frame again and again creating many off center circles. Tip: Use a pencil first! 

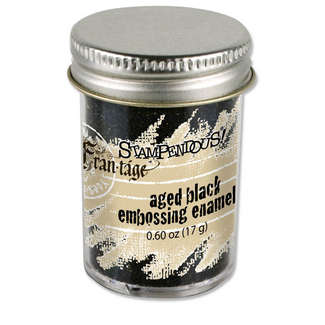
I stamped my sentiment and colored it with pastels, then glued it to the back of the frame giving it a day to thoroughly dry. I sprinkled Bronze Crushed Glass Glitter and Black Crushed Glass Glitter around the edges of the sentiment. When it was time to pour the resin I decided to add a butterfly with the same coloring and technique I had created on the frame sentiment. I sprinkled some Black Crushed Glass Glitter to the body of the butterfly and then Fran•táge with some Aged Black Embossing Enamel.  I painted the resin onto the front and back of the butterfly and let it cure on my craft mat. I poured, no I should say drizzled, resin over the glitter into the magnet frame in hopes that it wouldn't move much, then kept adding resin until it was filled to the interior of the frame opening.

That's it for my project. Hope you have a great time on the hop today. Now head on over the Jennifer's blog


Take a look at the Featured Products I used for today's project:


Details:
Resin Crafts Products: Jewelry Resin
Stamps: Jumbo Hydrangea (Stampendous), Dream Text (Stampendous), Cling Breathe (Stampendous)
Paper: Vintage Graph Paper
Ink: Tuxedo Black (Memento, Tsukineko), VersaMark Watermark Pad (Tsukineko)
Accessories: Black Crushed Glass GlitterBronze Crushed Glass Glitter, Aged Black Embossing Enamel, Round Magnet Frame (Sierra Pacific Crafts at Craft Warehouse), Pastels, Faber-Castell PITT Superfine Artist Pen, Clear Decoupage Finish (Plaid)

Pin It

Tuesday, July 10, 2012

Have a blast making your own jewelry with Stampendous and EnviroTex Jewelry Resin


Stampendous and Carmi from Resin Crafts Blog are heading into the second day of absolute fun! We have partnered together for a WHOLE WEEK to create in a new way with some extraordinary products! Thank you Stampendous and Carmi for giving us the time and supplies to... well, just have FUN!

My first project to share is a bezel with layers. It's simple, but a very classy pendant. I wanted to use it for a necklace, but all the chains I own have too wide of a clasp to put through the bail of the bezel. I didn't have any matching wire to create another jump ring so I'll have to keep my eyes open for a wee wire sale at Michael's or Craft Warehouse.

As you can see from my supplies photo I used a scrap paper already made from crumpled tissue paper glued down and painted with some ink. (It's peeking out from under the Pirate Gold jar.) I cut that piece down to just inside the bezel base and used white glue to adhere it.

The small flower from Daisy Stem Perfectly Clear Set was stamped with VersaMark onto clear acetate and then embossed with Pirate Gold Embossing Powder. Quick circular motions with the heat gun to keep the acetate from warping.

The resin was a two pour project. I dropped down a small amount of resin with the included craft stick and then added on the clear acetate pressing that down until it had the resin layer flat. Then I dropped more resin on top of the acetate until I have a dome effect. I did need to use a toothpick to move the resin to the edges, but that wasn't very hard to do. Now I had to wait!

The stamped image was on a piece of acetate larger than the bezel so I marked each corner with a Sharpie Marker and cut from dot to dot, being careful not to catch any of the black dot, with a craft knife. I didn't cut all the way across the acetate, because that would cut off the dots I needed to cut across in the other direction. Clear as mud? :)


My next project is a button! Now what to do with a bright blue oval button? Why this of course!


A lapel pin! I used the flowers from the Charm Collection Clear Stamps and some Gold Halo Glitter on the inset of the button. I stamped two words off of the Dream Text Stamp with Detail White Embossing Enamel onto black cardstock and just hand cut out the two pieces. All this was glued down with white glue. Then embossed the rim of the button with Aged Black Embossing Enamel. Poured the resin in and let it harden.


Just a few details about this week. There will be daily posts on the Resin Craft Blog and Stampendous Blog with a new list of designer's blog for a hop. Today is a short one with Carmi and three Stampendous Designers. If you hop with use

Now this is what you're in for... Prizes!! Carmi has 3 prize packages that can be won by our fans in Canada where she lives. She will draw three Canadian winners from the comments on her blog all week. We have 3 prize packages for our friends with US mailing addresses.
  • We'll draw one winner from the weekly comments on our blog.
  • We'll draw one winner from the comments on Saturday's Big Blog Hop
  • We'll draw one winner from Facebook - You need to SHARE one or more of our posts about this project on your Timeline **
Each prize package from us will include a Jewelry pack of Resin, a bottle cap, bezel and button to try, and the Stampendous Charm Collection Perfectly Clear Stamps - perfect jewelry sized stamps for your crafting pleasure!

It's time to head on over to Kristine's blog...


Details:
ResinCrafts Blog: Jewelry Resin, bezel and button
Stamps: Daisy Stem Perfectly Clear Stamps (Stampendous), Charm Collection (Stampendous), Dream Text (Stampendous)
Paper: clear acetate, Coral, Black scraps of cardstock

Ink: VersaMark Watermark Ink Pad (Tsukineko), Jet Black (Tsukineko)
Accessories: Pirate Gold Embossing Powder (Stampendous), Gold Halo Glitter Mix (Stampendous), Aged Black Embossing Enamel (Stampendous), Detail White Embossing Powder (Stampendous), White Gel pen, Matte Mod Podge

Pin It