This whole week the design team at Stampendous will be sharing a bonanza in coloring with Tombow Dual Brush Tip markers. The Stampendous designers love to color. We really do! I think that's all we really want to do, so when we heard that Tombow was coming to color with us we were excited! On Friday we will all be in a Blog Hop together and there will be prizes! Details can be found on the Stampendous Blog.
(If you've been hopping with the Stampendous team throughout the week, this is a blast from the future. You are reading this on a Wednesday, but this link was live on Monday So...)
I started this piece as a practice to get use to the coloring style and the markers were so rich in color and easy to lay down on the paper that I had to keep going. (If you think you've seen this Cherry Bird on my blog recently, you are correct. It's just a great stamp to color with lots of organic elements.)
I took full advantage of the Pen Techniques file that Marie Browning provided to the team for this image, so I will attempt to guide you through them all.
You will see close-ups of this image I took before the glitter and Mica Fragments were added.
 | The upper leaves were colored with 238 picked up onto 090 from the Blending Palette. The leaf tips were highlighted with 090. For shadow on the veins, 245 was diluted onto the Colorless Blender from the Blending Palette. Branches were colored with 969 picked up onto 603. In a few spots a direct coloring of 992 and 245 were done for contrast. |
 | The lower leaves use 238 on the Colorless Blender and highlighted with 090 sparingly. Same coloring for the vein shadow as on the upper leaves. Shadows were colored with 238 directly and a Blending Palette mix of 238 and 528 picked up on the Colorless Blender. |
 | This Cherry Bird is quite a bit of fun techniques. The head, cheek and tail color is 528 on the Colorless Blender. There are a few lines of 528 on the tail and head for details. The eyelids have a direct color of 553 and The beak is 925 on the Colorless Blender with 837 on a cleaned Blender in the corners. The body is 993 on a Blender with detail using the nib end of the pen. Wings were colored with 992 on the Blender and a second pass with 993 also on the Blender for some feather highlights. 969 on the Blender was used for shadow. |
 | The blossom colors are 772 on Blender from the outside of the petal to the stamen. The center is 990 on Blender first then 969 on Blender. |
 | For the writing, 603 on Blender was used until clean so each column would have a varying gradient. |
 | Leaves were glittered with Lime and Teal Micro Glitter over Tombow Mono Aqua Glue. |
 | Cherry Bird was glittered with Sunflower Micro Glitter. The blossom stamen were glittered with Pink Micro Glitter. |
|
| |
 | The last Tombow technique on the card is using the Splash technique. To get it just right the image was placed underneath a clear acetate so 990 could be placed the right size for the paper. The acetate was sprayed with water and the image was placed face down onto the acetate. A second time with 969 just around the edges with the same technique and then a third time with 553 sparingly. |
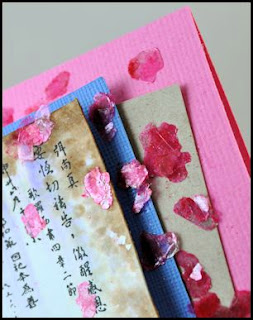
 | Once the card was assembled, Red Mica Fragments were added with Tombow Mono Aqua Glue. |
| Tombow ABT Dual Brush Pens Used: | 090 – Baby Yellow 238 – Dark Moss 245 – Sap Green 528 – Navy Blue 553 – Mist Purple 603 – Periwinkle 772 – Blush 837 – Wine Red 925 – Scarlet 969 – Chocolate 990 – Light Sand 992 – Sand |


WOW... How beautiful and gorgeous!!
ReplyDeleteWow! Great colors and a super tutorial.
ReplyDeleteWhat a lovely card! I love the Cherry Bird stamp. Thanks for sharing your step by step process. Very helpful!
ReplyDeleteWow.....what a production!! That would take me a year to complete. But your finished piece is just gorgeous. I enjoyed reading through the technique process. I'm not a color-er, so it helps me appreciate what all goes in to it. Lovely work!!!
ReplyDelete<3 J
jwoolbright at gmail dot com
HerPeacefulGarden.blogspot.com
Wow! Just beautiful.
ReplyDeleteGreat colors, thanks for the tutorial!
ReplyDeleteHi Janelle! I love this card and coloring techniques. The finished design is just beautiful. I want you to know I'm linking this post to my weekly e-news for people to enjoy seeing your work and for the handy link to the Tombow pen techniques. hugs, Lyn
ReplyDeleteThanks Lyn, that's really nice to be linked up to your news post!
DeleteGreat project, fantastic coloring I really like the splash technique and love the mica bits too!
ReplyDeleteWonderful card!! Thanks so much for the detailed explanation of how you did it!!!!!
ReplyDeleteThis is a little masterpiece. Thanks for sharing the details of the beautiful coloring work you were able to create!
ReplyDeleteOMG..Beautiful job!!
ReplyDeleteUS address
Wow!!!! The attention to detail is impeccable! I hope to be this adventurous in my crafting one day.
ReplyDeletewonderful and thanks for all the coloring tips.
ReplyDeletesue in Ohio
Beautiful! Love how you explained all of the techniques. And I love the red Mica fragments. Love this stamp too! Thanks for sharing.
ReplyDeleteKatie B.
Beautiful card. The bird is colored so nicely. Love the hanging vines at the top of the card. the pretty pink bow sets everything off. Great job.
ReplyDeleteGreat tutorial and beautiful card. I love the soft colors and the glitter and mica.
ReplyDeleteisoscia at aol dot com
So sweet!
ReplyDeleteGorgeous card! I love the vibrant colors and the cute bird, thanks for sharing.
ReplyDelete